I often Google my way around the interwebs looking for tips and tricks to help improve my baking to be the best it can be. To that end, I’ve collected a number of interesting factoids that I use daily whenever I turn on the oven, and here I am sharing them with you. Buon Appetito!
- Use quality heavy-duty bakeware. Cheap, thin metal pans will warp and burn your baked goods in high temperatures, and the non-stick coatings flake off in time. Not healthy!
- I
 n that same vein, non-stick bakeware is not a prerequisite, especially if you are concerned about using non-stick products. However, you do need to ensure that you are “encouraging” your baked goods to release from your pans if you choose not to use non-stick, which means heavily greasing and flouring cake tins, and otherwise using baking liners, Silpat baking mats, or parchment paper. Do not forego that step, or you’ll be chipping out all your hard work straight into the garbage can!
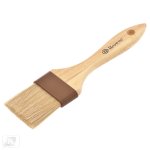
- Use a pastry brush to butter your pans: You’ll get better coverage than with a piece of butter, plus it makes buttering parchment a breeze. Simply swipe the brush over a tablespoon of very soft butter, then onto the pan or paper.
- Position your pans as close to the centre of your oven as possible: They shouldn’t touch each other or the oven walls. If your oven isn’t wide enough to put pans side by side, place them on different racks and slightly offset, to allow for air circulation.
- Cool your cakes upside down: This will flatten out the tops, creating easy-to-stack disks for layer cakes. If the top of a cake is still too rounded, slice it off with a serrated knife.
 For evenly-baked cakes, no domed tops, and no-fuss assembly, bake “layer-by-layer.” This means if you’re baking a 3-layer cake, use 3 of the same size/shape pan, and bake 3 shorter layers at same time.
- Rotate your pans during baking: This will ensure even baking. But wait until the cake is set—about two-thirds of the way through the baking time—to prevent collapse. If you’re using more than one rack, this is also the time to swap the pans to different racks.
- Use a small offset palette knife to spread batter evenly in pans. Don’t fill more than 1/2 full–2/3 at the most.
 Buy a good quality digital oven thermometer; the first thing you should do with it is to check to see if your oven is actually the temperature it says it’s giving you on the dial. Many older ovens can be as much as 50 degrees off the stated temperature; if yours is off, make adjustments in your baking time.
- Prevent sharp edges on muffins, bar cookies or quick breads by greasing the muffin cups or pans only on the bottom and halfway up the sides so the batter is higher than the greaseline. This is one time you might not want to use a pan spray.
- Use the middle rack, unless otherwise stated in the recipe.
- Typically, baking cakes are close to being “done” when you can smell cake in the kitchen. I know this sounds odd, but I swear by it!
 When testing for “doneness”, don’t pull out your baking cake, but instead leave it in the oven; when a skewer comes out clean (no crumbs) from the center of the cake, it’s done.
- Glass versus metal baking pans give different results; baked goods will finish baking at different times depending on whether you use a glass or metal pan. Most recipes use metal pans as their “default” recipe instruction; if using glass, you’ll want to lower your oven temperature by 25 degrees. Shiny aluminum pans are best when you make a cake because they reflect heat away from the cake and produce a tender, light brown crust.
- Preheat your oven before you start mixing and prepping — it’s best if the oven is preheated for 20 to 30 minutes at the proper baking temperature.
With thanks to:
- http://www.bettycrocker.com/tips/tipslibrary/baking-tips/cake-baking-tips
- http://www.homebaking.org/bakingtips/#measuring
- http://www.bonappetit.com/test-kitchen/cooking-tips/article/make-baked-good-better
- http://www.mrfood.com/How-To/Cake-Baking-Secrets#T0swbfcg54JSvMzU.99

